Relax Your Eyes

Posted by: pctutorials  :  Category: Tips, Top Software, Windows

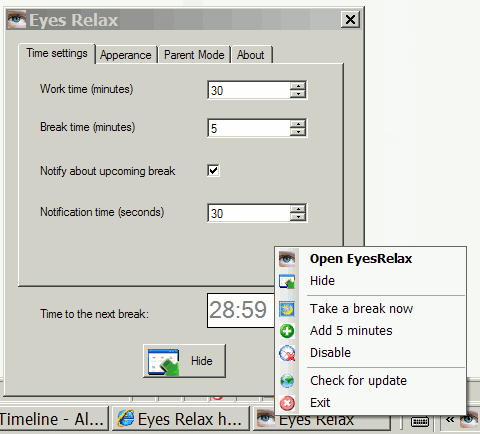
Today, I came across a nice windows utility called Eyes Relax. This piece of freeware reminds you to rest your eyes at a user-set interval and can set a break time. Resting your eyes from computer screen is vitally important as focusing on a single object all day long will cause eye strain.

Also, a recently added feature to the utility is parent mode. This can be used to protect your children, forcing them to take breaks. In parent mode the program cannot be disabled and the computer is password-protected during a break. This is very useful since children often forget about the real world and play video games much too long. You can download this wonderful utility from the Eyes Relax author page here: Eyes Relax 0.36

Eyes Relax

If you enjoyed this post, make sure you subscribe to my RSS feed!

Should You Buy Cheap Ink?

Posted by: pctutorials  :  Category: Hardware, Tips

Many of us are confronted with buying expensive genuine ink from the big companies. There a lots and lots of 3rd party companies that make ink for leading manufactures at a fraction of the cost. Being so cheap, we are inclined to buy the cheaper ink. But what it leaves us with is the consequences of cheap ink.

In my experience, cheap ink can have a good short term, but a very bad long term effect. In the short term, we save money on ink cartridges but due the ink quality, print heads get clogged and damaged, thus leaving us to buy a new print head. On the other hand, you could buy genuine ink, which would give you lasting picture quality and better maintained print head but you cop the price of the ink cartridges.

The best solution to this is to buy a continuous ink supply system. Granted the supplier provides quality ink, it’s much cheaper than buying genuine ink and you don’t have the problem of broken and clogged print heads. So what is a CISS? The CISS is a self contained unit with its own cartridges fed by silicone tubing from a large ink reservoir which sits beside your printer. The system acts like a giant cartridge by feeding ink to the printer when required. Using a CISS system is an extremely cost effective way of printing and can save you upto 95% of printing costs.

RIHAC Digital Solutions provide CISS for most inkjet printers. If you tend use your printer a lot, I highly suggest you check them out. They ship internationally and offer fairly completive pricing. But what is most important is the ink quality. RIHAC don’t use cheap generic ink, they use Premium grade UV Micro filtered ink imported from USA, Germany and Japan.

If you enjoyed this post, make sure you subscribe to my RSS feed!

Save Energy By Using Blackle

Posted by: pctutorials  :  Category: Tips

Blackle, by Heap Media is a search engine site powered by Google designed to save energy. Blackle saves energy because the screen is predominantly black. A given monitor requires more power to display a white (or light) screen than a black (or dark) screen. However if you’re using a LCD screen, the colour of the display doesn’t have an effect on power usage as the back light is always on. But if you’re using a CRT or Plasma display, then you’ll definitely be saving the environment using Blackle. Even if it’s not about the power saving, some of you may prefer the dark theme :) . You can see it for yourself here:

http://www.blackle.com

If you enjoyed this post, make sure you subscribe to my RSS feed!

Increase Vista/Xp Boot Up Speed on Dual/Quad Core CPU’s

Posted by: pctutorials  :  Category: Tips, Windows

Over at MeraWindows, member dmudgal has come up with a nice tip to increase both XP and Vista’s bootup time. He’s also created a simple script to clock the boot up time, so that you can verify the difference. Here’s how to do it:

1. Open up notepad, copy and save the following as XPReboot.vbs :

Option Explicit
On Error Resume Next
Dim Wsh, Time1, Time2, Result, PathFile, MsgResult, MsgA, AppName, KeyA, KeyB, TimeDiff
MsgA = “Warning! Close all running programs and click on OK.”
KeyA = “HKEY_CURRENT_USER\Software\RestartTime\”
KeyB = “HKEY_CURRENT_USER\Software\Microsoft\Windows\CurrentVersion\Run\RestartTime”
AppName = “Boot Up Time”
Set Wsh = CreateObject(”WScript.Shell”)
PathFile = “”"” & WScript.ScriptFullName & “”"”
Result = wsh.RegRead(KeyA & “Times”)
if Result = “” then
MsgResult = Msgbox (MsgA, vbOKCancel, AppName)
If MsgResult = vbcancel then WScript.Quit
Wsh.RegWrite KeyA & “Times”, left(Time,8), “REG_SZ”
Wsh.RegWrite KeyB, PathFile, “REG_SZ”
Wsh.Run “cmd /c Shutdown -r -t 00″, false, 0
else
Wsh.RegDelete KeyA & “Times”
Wsh.RegDelete KeyA
Wsh.RegDelete KeyB
TimeDiff = DateDiff(”s”,Result,left(Time,8))
MsgBox “Your system reboots in ” & TimeDiff & ” seconds”, VbInformation, AppName
end if
wscript.Quit

2. We know want to check the time it takes to boot up before applying tweak. Click on XP Reboot.vbs and hit Enter. A dialog box will appear giving you a warning that the file you are about to run is an executable and it may contain viruses. I can gurantee the script you just saved does not contain a virus. Clicking Ok will reboot the computer, which is what we want.

3. After the reboot, you’ll see a dialog box which will be display the time taken by your system during reboot. Note this time.

4. Lets apply the tweak. Click Start>Run and type msconfig.

5. This will take you to the System Configuration dialog box. Click on the Boot tab given in the upper side of the dialog box and click Advanced Options button. Here click the check box for Number of Processors. This will activate the drop down menu given just below it.

6.If you have a Dual Core CPU select 2 or if you have a Quad Core CPU select 4. Press OK and Apply changes. Windows will now ask for your confirmation for the changes that you’ve made in the boot settings. Click Yes and press Restart button in the following dialog box.

7. After coming back to windows you’ll have to restart your system again by clicking on the XPReboot.vbs file (like you did before) because this will give us the time taken by the system to boot up.

8. When you get back to windows you’ll see the same dialog box displaying the time in seconds. Compare it with the previous one and see if there is some improvement.

If you enjoyed this post, make sure you subscribe to my RSS feed!
Recover From Explorer Crash

Posted by: pctutorials  :  Category: Tips, Windows

Restore from windows crash

How is it that Windows decides to crash when you’re working on that important document, or editing that perfect art piece in Photoshop? Microsoft Windows does have a tendency to crash so it’s important to save often. But what if you’ve forgotten to save that file? If your PC has crashed on a software level, it may be possible to recover the file or document that you were working on depending on the severity of the crash.

A good indicator to whether or not you can recover from the crash is to verify the num lock led can be turn off and on. If it can, it means your PC is still responsive. Here’s how to recover from an explorer crash on XP or Vista:

1. Press together ctrl, alt, delete to open the Windows Task Manager.
2. In the processes tab, find explorer.exe . Right click and End Process. You should be left with a blank desktop with no taskbar.
3. Open up the Windows Task manager again (ctrl ,alt , delete), click file>New Task and type “explorer.exe” (w/o quote).
4. This should resurrect all open programs and bring back the desktop and taskbar.

And hopefully, the file in which you were working has been left intact. But remember; don’t substitute this tip for saving your work regularly. ;)

If you enjoyed this post, make sure you subscribe to my RSS feed!

How to Increase Network Browsing Speed

Posted by: pctutorials  :  Category: How To, Networks, Tips, Windows

If you’ve ever browsed folders on a network, you’ll know how slow it can be. With a simple registry hack, you can increase your network browsing speed. Here’s how to do it:

  1. Click Start>Run and enter ‘regedit’.
  2. Navigate to HKEY_LOCAL_MACHINE/Software/Microsoft/Windows/Current Version/Explorer/RemoteComputer/NameSpace
  3. Locate the key named {D6277990-4C6A-11CF-8D87-00AA0060F5BF}. This key tells Windows to search for scheduled tasks, of which there are none. Right click on it and delete it.
  4. If you have no use for viewing remote shared printers and is only interested in shared files, consider deleting the printers key as follows: {2227A280-3AEA-1069-A2DE-08002B30309D}. This will further improve network browsing speed.

Your networking browsing speed should be now considerably faster, as it will have no delay.

If you enjoyed this post, make sure you subscribe to my RSS feed!
Learn About Your Vistitors

Posted by: pctutorials  :  Category: Tips, Web Design, Wordpress

If you’re website owner, you know it’s important to have visitors, and with the right information, you can improve your visitor statistics. These statistics can tell you a lot of things, such as the number of unique visitors you’ve had, where they come from, what they look at, and the time they spend visiting. Chances are you’ve got a nice stat counter from your web hosting provider; if you haven’t, I’ll show you how to add one for free.

You may think that because you don’t sell any products, you don’t need to log stats. This is untrue. For example, my blog provides tutorials and tips for PC’s. With statistic information, I can see which tip or tutorial is popular, and then use that to my advantage by providing more tips or tutorials on that topic.

So how do log these statistics? What you need is a visitor tracking service. The service operates by giving you a code to stick on your website so that they can track the information for you. The service that I recommend is StatCounter. The service is free for small websites and the depth of data recorded is very good. Everything is set out well and is easy-to-read. With this service enable, you’ll be able to see what popular and what’s not, therefore able to provide better content.

If you’re using interested in obtaining statistics, here’s how to add a counter to your site:

1. Visit www.statcounter.com and click ‘Register Now’ to open a free account and create a project for your current site.
2. Configure the specifications for your counter. You may wish to set the counter invisible or otherwise choose another option. StatCounter will provide you the code you need to copy and paste into the body area of every page on your website. Edit the files and re-upload them.
3. To view the statistics for your Website, visit www.statcounter.com and log in. Click the ‘My Projects’ link and click the project for the Web site to track. You’ll see a summary page with current visitor numbers – you can select other dates if desired and choose other stats from the list down the left of the screen.

If you’re using Wordpress like me, follow the previous steps until you get to the part of setting the counter invisible. Instead of pasting in a code to your Web site, StatCounter have provided a plugin for you to use:

1. Click here to Download a zipped version of the StatCounter Wordpress Plugin
2. Unzip this file and upload the enclosed PHP file “StatCounter-Wordpress-Plugin.php” into your “wp-content/plugins” folder
3. Go to your Plugin screen in your WordPress admin console
4. Fill out the details, as per the instructions.
5. Switch the plugin over to Enabled.

If you enjoyed this post, make sure you subscribe to my RSS feed!
Vistamize XP

Posted by: pctutorials  :  Category: Tips, Windows

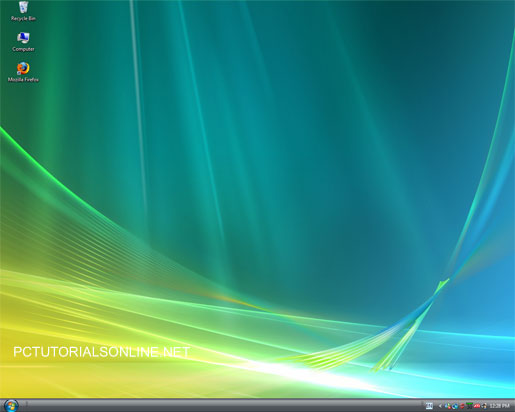
A lot of people quite like the look of Vista, but cannot buy it because their PC isn’t powerful enough and don’t want to spend money upgrading either. There are many WindowBlinds themes created by users that look like Vista, but this doesn’t give you the Vista startup screen, Shutdown screen, sidebar and so on. You could argue that using WindowBlinds, along with other third party tools to create the Vista experience is a good solution. But what if you could transform Windows XP to Vista with one program? That would be a lot easier, wouldn’t it?

Thanks to Manuel Hoefs, you can use VistaMizer to emulate Windows Vista on XP. It creates a most adequate replica of Vista, using a single installation program with easy to follow prompts. Installation does however modify system files, but they can be restored back to their original state easily as the program creates a system restore point before modify them if you need to. You can download the program from:

http://vistamizer.uptodown.com/en/

Vistamize XP

If you enjoyed this post, make sure you subscribe to my RSS feed!