October 29, 2008
Posted by: pctutorials : Category:
Hardware,
Quiet PC,
Uncategorized
Ever wondered why your PC started making an annoying buzzing noise? Chances are it is probably because of a fan clogged up with dust. I turned on my PC recently to be welcomed by these symptoms above. The good news is that it is an easy thing to fix. If you’re not computer literate, or are not comfortable opening up your PC case, I suggest you get help from someone who does.
The first thing is to identify which fan is causing the noise. This can be a little bit tricky when you have five or so fans running. To identify the noise, I place my finger on the fan hub lightly to slow it down for a second and see if the noise lessens. If it does, you’ve found your problematic fan. The next thing to do is remove the fan from the chassis/PC. In my case it was the GPU. After pulling the gfx card out, here’s what it looked like:

Nasty isn’t it?
I’ll also point out here that dust causes airflow blockage causing more heat to be captured rather than dispersed. I used a small paint brush to clean out the HSF (Heat Sink Fan) and the heat sink itself. The paint brush does a pretty good job. Never user a vacuum cleaner to clean pc components, the static created by the vacuum cleaner will fry the chipset, leaving you with nothing but paper-weight.While it maybe possible that the dust is causing the buzzing noise, most fans today use sleeve bearings, which are quieter than ball bearings, but do not last as long. So the buzzing noise could be that the bearings are worn out.
A good way to fix it is to apply some light machine oil to the fan. If you fan is in a heat sink, remove the fan by unscrewing the three screws and turn it over so that you can see the back sticker. Gently lift up the sticker so that you can see the fan motor (See picture 2). Apply a couple of drops of oil and replace the sticker. Spin the fan a couple of times with your fingers to lubricate the fan evenly.
Put everything back together and give your PC a whirl. You should now have successfully hushed your PC and improved cooling.

A couple of drops should do the trick!
If you enjoyed this post, make sure you subscribe to my RSS feed!
September 17, 2008
Posted by: pctutorials : Category:
Case Mods,
Quiet PC,
Tips
What do you mean “suspend” your hard disk? This is a very common practice for quiet PC enthusiasts. It’s the instance of taking your hard disk and holding it in place using elastic. What’s the advantage? Hard disk noise is greatly reduced because usually when hard mounted, the hard disk transfers noise through the screws and onto the case chassis. This amplifies the amount of noise being made. I’ll show you how I did mine and best of all, if you have two pairs of old undies hanging round, you can do this mod for free!
First thing to do is to obtain some elastic. If you have some old undies, these would be perfect for this operation. Cut off the material part of the underwear, which will leave you with two loops of elastic, one from each.
Elastic; check!
I’m using a 5.25 inch drive to mount my hard disk; however you may be able to find somewhere else to mount it. Once you have you elastic mounted and secured, feed the hard disk drive through the elastic and verify that it isn’t touching the metal chassis. It’s a bit of trial and error, but you should find a sweet spot. Re-connect the Hard disk drive power and SATA (or IDE) and boot it up. You’ll be amazed at what you can’t hear anymore. The elastic magically absorbs the vibration, which in turn dampens the noise. Not bad for two pairs of old undies eh? Enjoy.
If you enjoyed this post, make sure you subscribe to my RSS feed!
August 28, 2008
Posted by: pctutorials : Category:
Quiet PC,
Tips
Most of us are running desktop computers and use them everyday for things such as checking emails, surfing the net, chatting, buying of ebay, playing games and more task. In other words, we use computers a lot. Most people don’t mind the buzzing noise computers make, while others prefer to have their computers quiet as possible. If you’re of the latter, this tip will benefit you greatly.
Soft mounting case fans is the practice of using something soft that is not a metal screw to mount the fan. Whats the benefit? Because fans are a spinning device, they cause vibration, which gets transferred through to the chassis. This is the intrusive noise that you hear every time you turn your computer on. While there are other noise contributing parts, we’re going to focus on the fan mounts because its the cheapest method of silencing your PC. The soft rubber mounts in can be bought from PC Case Gear in Australia. The one’s I’ve linked are compatible with closed case fans. What are closed case fans? Closed case fans are where the corners of the fan sealed by plastic. There is a diagram on the same page as the soft rubber mounts if you need help verifying your fan(s). If you have open fans, use these.
Here are my rubber mounts, you’ll notice they’re different to the ones listed at PC Case Gear because these were bundled with a Nexus fan.
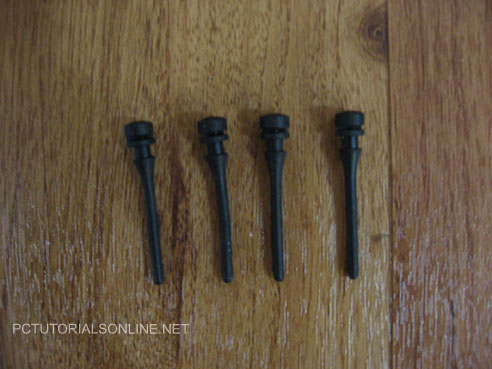
The four rubbery figures
Obviously if you’ve already got a case fan mounted you’ll have to remove the screws. Once thats done, the tricky part is pulling the rubber mounts through the chassis and case fan. I’ve found if you dip the rubber mounts in some water and dish washing detergent, the rubber mounts will slide through easier. After you’ve done the first one, the next three should be easier.
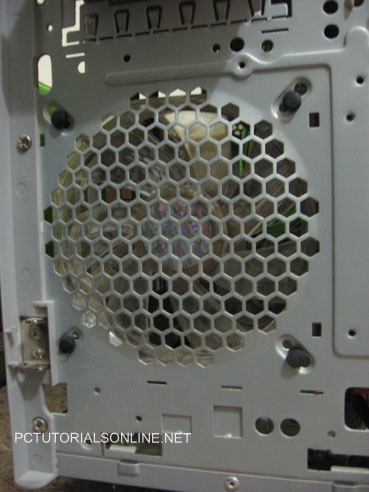
All mounts in place.
Verify all the mounts are pulled through correctly and are snug. You can now put back the side panel and front fascia of the case back and give a test run. I immediately noticed a difference in sound levels, there was a less droning noise after doing this mod. You’ll get an even better noise level drop if you do this to both intake and outlet fans. All I can say is, for $3.50, these mounts do an excellent job.
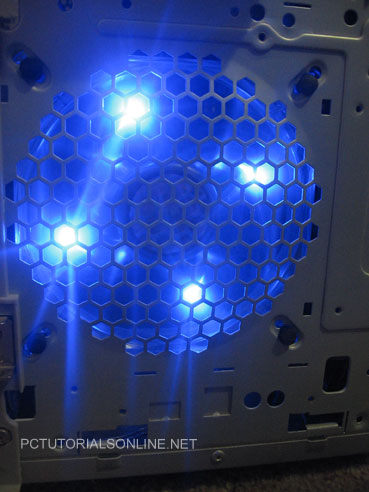
Looks good and sounds quiet; perfect.
If you enjoyed this post, make sure you subscribe to my RSS feed!